

 4.9
4.9 4.5
4.5The document settings you choose before writing a single word determine whether your cover letter gets read or gets filtered out. This guide walks you through cover letter formatting from blank page to export-ready PDF in about 20 minutes, with exact specs for margins, fonts, section structure, and file export.
TL;DR: Set 1-inch margins, a 10–12pt sans-serif font (Calibri or Arial), single or 1.15 line spacing, and left-aligned block format with no paragraph indents. Structure the letter in six sections, header, date/employer address, salutation, opening, body, sign-off, then save as PDF to lock the layout.
Before You Start
You need a word processor (Google Docs, Microsoft Word, or LibreOffice Writer all work), a job posting you’re applying to, and about 20 minutes of focused time. No special software or accounts are required. If you already have a draft cover letter and want to fix the formatting, skip ahead to Step 1 and apply each spec to your existing file.
A few things worth knowing before you begin: employer survey data shows that 64% of rejected cover letters fail because of formatting or structural issues, and Microsoft’s Word Blog 2026 formatting guide confirms that clear sections, consistent spacing, and a readable layout are baseline expectations. The formatting itself isn’t complicated, but each setting matters because applicant tracking systems parse your document field by field. One wrong placement can scramble your information before a human ever sees it.
You should also have the hiring manager’s name if possible. A generic “To Whom It May Concern” signals that you didn’t research the company, which is a red flag many recruiters flag before reading the body. Our guide on phrases hiring managers filter out covers this in detail.
Step 1: Set Up Margins, Font, and Line Spacing
The goal of this step is to configure your document so that everything you type afterward fits cleanly on one page and reads well on both screens and printouts.
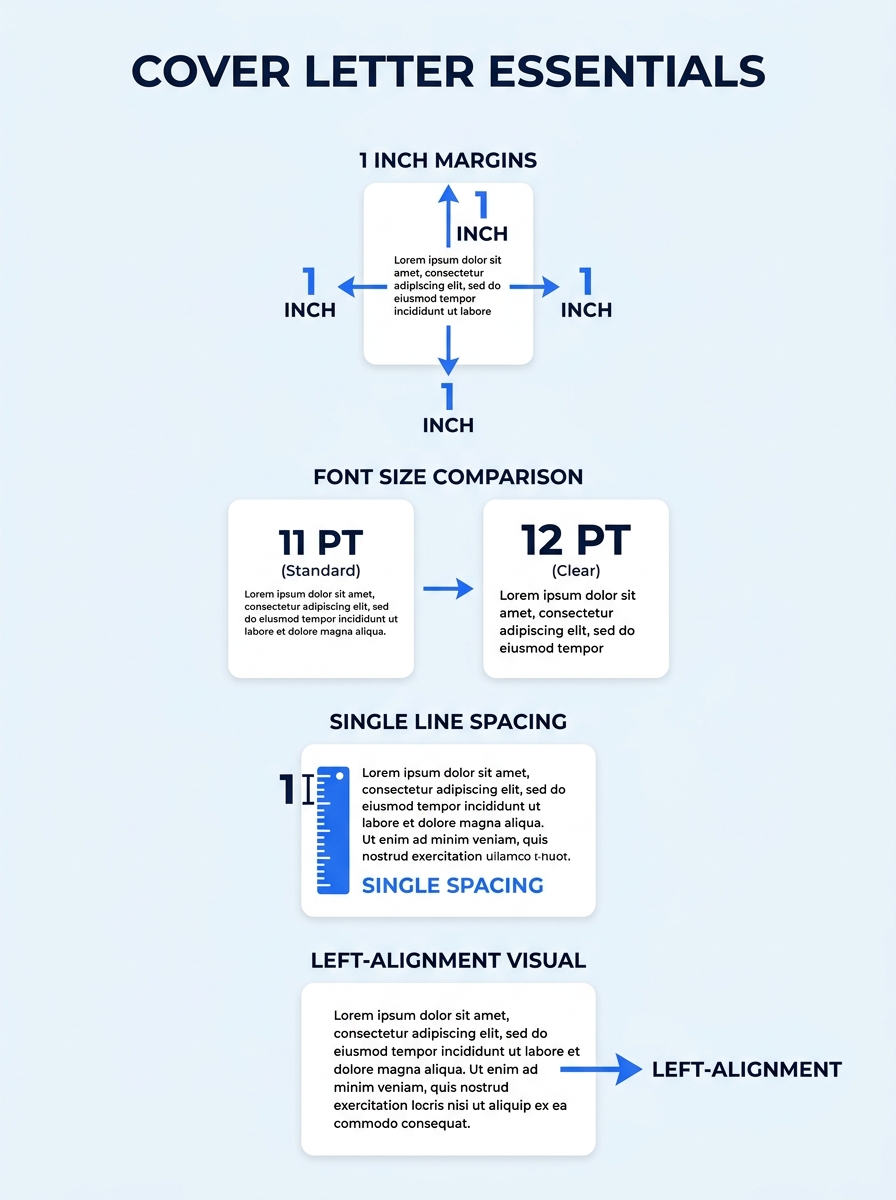
Margins: Set all four margins to 1 inch (2.54 cm). This is the universal standard across professional business correspondence. If your content runs slightly long and spills onto a second page, you can reduce margins to 0.75 inches, but no smaller. The ResumeAdapter formatting guide notes that going below 0.75 inches creates a cramped appearance that signals poor attention to detail.
Font: Pick one professional font and stick with it for the entire document. Never mix more than one font in a cover letter. Here’s how the most common options compare:
| Font | Type | Recommended Size | Best For |
|---|---|---|---|
| Calibri | Sans-serif | 11pt | Modern industries, tech, startups |
| Arial | Sans-serif | 11pt | General applications, ATS-friendly |
| Garamond | Serif | 12pt | Academic, legal, traditional sectors |
| Cambria | Serif | 12pt | Finance, consulting, government |
The Grammarly formatting guide recommends fonts like Arial with a size of 12 for readability, though 11pt works equally well for sans-serif faces. The key number: 94% of hiring managers say cover letter formatting influences their interview decisions, so this choice carries real weight.
Line spacing: Set to single spacing or 1.15. Add a full blank line between paragraphs instead of using indentation. Left-align all text, do not justify, center, or right-align the body. Justified text creates uneven word spacing that looks awkward on narrow columns and can trip up some ATS parsers.
You’ll know this step worked when your blank document shows even white space on all four sides, your cursor sits at the top-left, and a test sentence displays at a comfortable reading size.
Step 2: Build the Contact Header
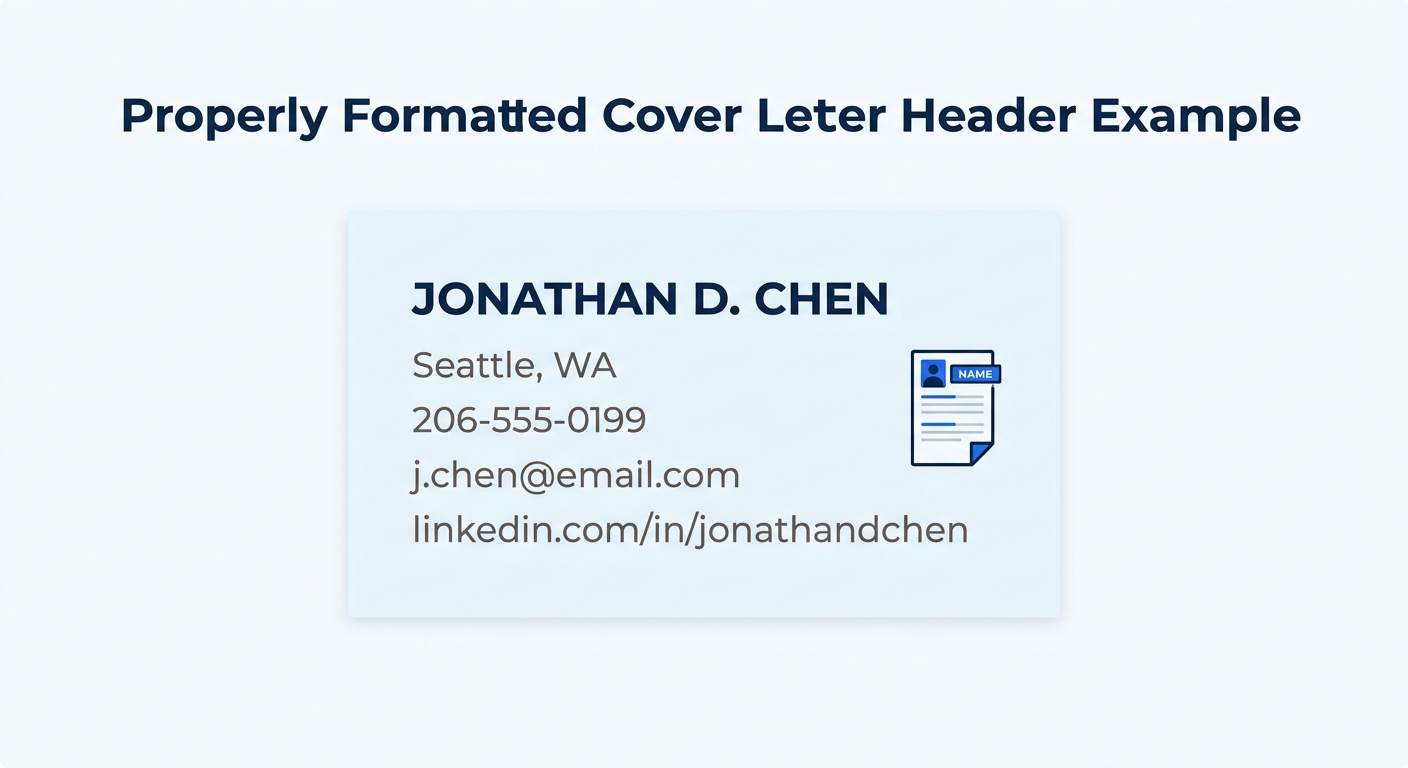
Your header goes at the very top of the document body. Place your contact information in the body text area, not in Word’s or Google Docs’ header/footer fields. ATS software frequently ignores header/footer fields entirely, which means your name and contact details vanish from the parsed data.
Include these elements, each on its own line:
- Your full name (bold, 2pt larger than body text, so 13pt or 14pt if your body is 11pt or 12pt)
- Your city and state (full street address is no longer standard and raises privacy concerns)
- Your phone number
- Your professional email address, a variation of your name, not a nickname handle
- Your LinkedIn URL (optional but recommended; if you want to make sure your profile is recruiter-ready, our guide on LinkedIn optimization for job seekers covers the essentials)
Skip a blank line after your header before moving to the next section. You’ll know this step worked when your name appears prominently at the top of the page, followed by clean contact details, with a visible gap before the rest of the letter.
Step 3: Add the Date, Employer Address, and Salutation
Below the blank line after your header, type the full date (e.g., September 26, 2026). Below that, add the employer’s information:
- Hiring manager’s name (if known)
- Their title
- Company name
- Company address (city and state at minimum)
Skip one blank line, then write your salutation. “Dear [First Name] [Last Name],” is the standard format. If you genuinely can’t find the hiring manager’s name after checking the job posting, the company’s About page, and LinkedIn, “Dear Hiring Manager,” works as a fallback. Avoid “Dear Sir or Madam” and “To Whom It May Concern,” which 83% of hiring managers consider outdated according to recent employer surveys.
You’ll know this step worked when the left side of your document shows a clean vertical stack: date, employer details, salutation, each separated by a single blank line, all left-aligned.
Step 4: Write and Format the Body Paragraphs
The body of your cover letter is where formatting decisions have the biggest impact on readability. Your letter should contain three to four paragraphs, running 250–400 words total. Current data shows 66% of job seekers prefer cover letters that run half a page or shorter, and hiring managers share that preference.
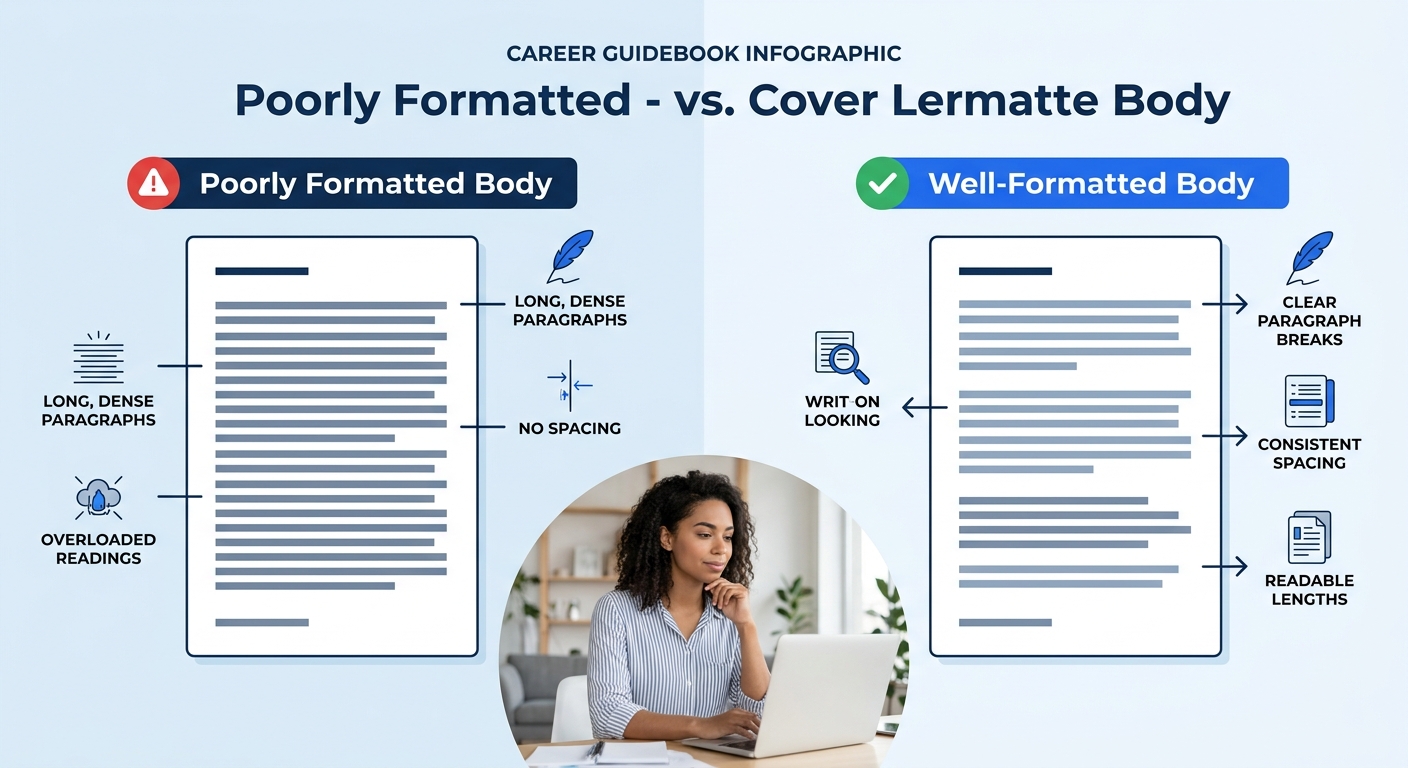
Do not indent paragraphs. Skip a line between them instead. This block-format approach gives you more space for actual content and matches the standard business letter style that both humans and ATS expect.
Opening paragraph (2–3 sentences): Name the specific role you’re applying for, where you found the listing, and one concrete reason you’re a strong match. This paragraph’s job is to keep the reader going, so lead with your strongest connection to the role.
Body paragraph(s) (1–2 paragraphs, 3–5 sentences each): Present your relevant experience with specific results. If you managed a project that reduced costs by 18%, say so. The problem-solution format performs particularly well here: name a challenge the company faces (drawn from the job posting or your research), then show how your experience addresses it directly. Our complete cover letter structure guide breaks down how to build these paragraphs with the right level of detail.
Closing paragraph (2–3 sentences): Restate your interest, reference one more qualification or value you’d bring, and include a specific call to action. “I look forward to discussing how I can contribute to your editorial team” is one example from Indeed’s formatting guide that works because it names the team and implies action without being pushy.
Tip: Keep every paragraph to five sentences maximum. If a paragraph runs longer, split it. Dense blocks of text get skimmed or skipped entirely, shorter paragraphs increase the chance each point actually registers.
You’ll know this step worked when your body text fits comfortably in the middle third of the page, each paragraph is visually distinct with a blank line between them, and the total word count lands between 250 and 400 words.
Step 5: Close, Sign Off, and Export as PDF
After your closing paragraph, skip one blank line and type your sign-off. “Sincerely,” “Best regards,” and “Respectfully” are all standard options. Follow the sign-off with your full typed name on the next line. For emailed or uploaded cover letters, a handwritten signature isn’t necessary. If you’re submitting a printed letter, leave three blank lines between the sign-off and your typed name for a handwritten signature.
File format: Save your finished letter as a PDF. This is the single most important export decision you’ll make. A PDF locks your margins, fonts, spacing, and alignment exactly as you set them, regardless of what device or operating system the reader uses. Word documents (.docx) can reflow text, swap fonts, and shift spacing depending on the recipient’s software version. Only submit a .docx if the application explicitly requires it.
File naming: Use the format FirstName-LastName-Cover-Letter-CompanyName.pdf. Hiring managers download dozens of files. A clear, descriptive filename saves them time and makes you easier to find later. Avoid generic names like “cover letter.pdf” or “document1.pdf.”
You’ll know this step worked when you open the PDF on a different device (your phone works fine for this) and the layout looks identical to what you created.
Common Problems and How to Fix Them
Three formatting issues come up more often than everything else combined:
The letter spills onto a second page. Reduce your margins to 0.75 inches. If that doesn’t fix it, drop your font size by one point (e.g., 12pt to 11pt). If you’re still over, your letter has a content problem: cut a paragraph or tighten your sentences. A detailed walkthrough on formatting adjustments covers this scenario step by step.
The header information disappears after uploading to an ATS. You placed your contact details in the document’s header/footer field instead of in the body text. Move everything into the main body of the document, starting at the very top. This is the most common ATS parsing failure and the easiest to fix.
The layout looks different on the recipient’s screen. You submitted a .docx file instead of a PDF. Re-export as PDF and resubmit if the application allows it. If you’re required to submit a Word document, embed the fonts (File > Options > Save > Embed fonts in the file) to minimize rendering differences.
Warning: Avoid placing important information in text boxes, tables within the document body, or floating images. ATS software reads documents linearly, anything outside the main text flow risks being ignored or parsed out of order.
Where to Go From Here
With your formatting locked in, the mechanical side of your cover letter is handled. The work that remains is content: making sure every paragraph earns its space on the page. If you want to see how different roles and industries call for different structural approaches, our collection of cover letter templates shows five formats side by side, each matched to a specific application scenario. And if you’re applying through LinkedIn alongside traditional job boards, connecting your cover letter voice to your profile headline and summary creates consistency that recruiters notice across channels. The formatting choices you’ve made here, clean, scannable, ATS-compatible, carry over to every application you send. Save your formatted document as a reusable template, swap in new content for each role, and spend your time on the writing instead of wrestling with margins.