

 4.9
4.9 4.5
4.5The letter cover format that survives ATS parsing and earns a hiring manager’s attention has six parts in a fixed order: header, greeting, introduction, body, closing, sign-off. This tutorial gives you exact font sizes, margin values, and spacing rules to build one from a blank document in under 30 minutes.
TL;DR: Use full-block format (left-aligned, 1-inch margins, 10–12pt standard font, single spacing) with six sections: header, greeting, introduction, body, closing, sign-off. Stay under one page and 400 words. Save as PDF unless a job portal requests .docx.
Before You Start
You’ll need a word processor (Google Docs, Microsoft Word, or LibreOffice Writer all work), the job posting open in another tab, the hiring manager’s name if you can find it, and about 25 to 30 minutes of uninterrupted focus. No design tools, no templates with columns or graphics. Your resume should already be finished, because you’ll match your cover letter’s header to it.
A few things to know before step one: 74% of recruitment decision-makers prefer applications that include cover letters even when the posting calls them optional. And 83% of hiring managers report reading the majority of the cover letters they receive. So this document carries real weight. Getting the letter cover format right means your content actually reaches human eyes.
If you’ve already read our guide to formatting a cover letter correctly, you’ll recognize some of these specs. This tutorial goes deeper, walking through each section in build order with verification checks along the way.
Step 1: Set Up the Document Shell
The goal of this step is a blank page with the correct margins, font, and spacing so every section you add afterward sits where it should.
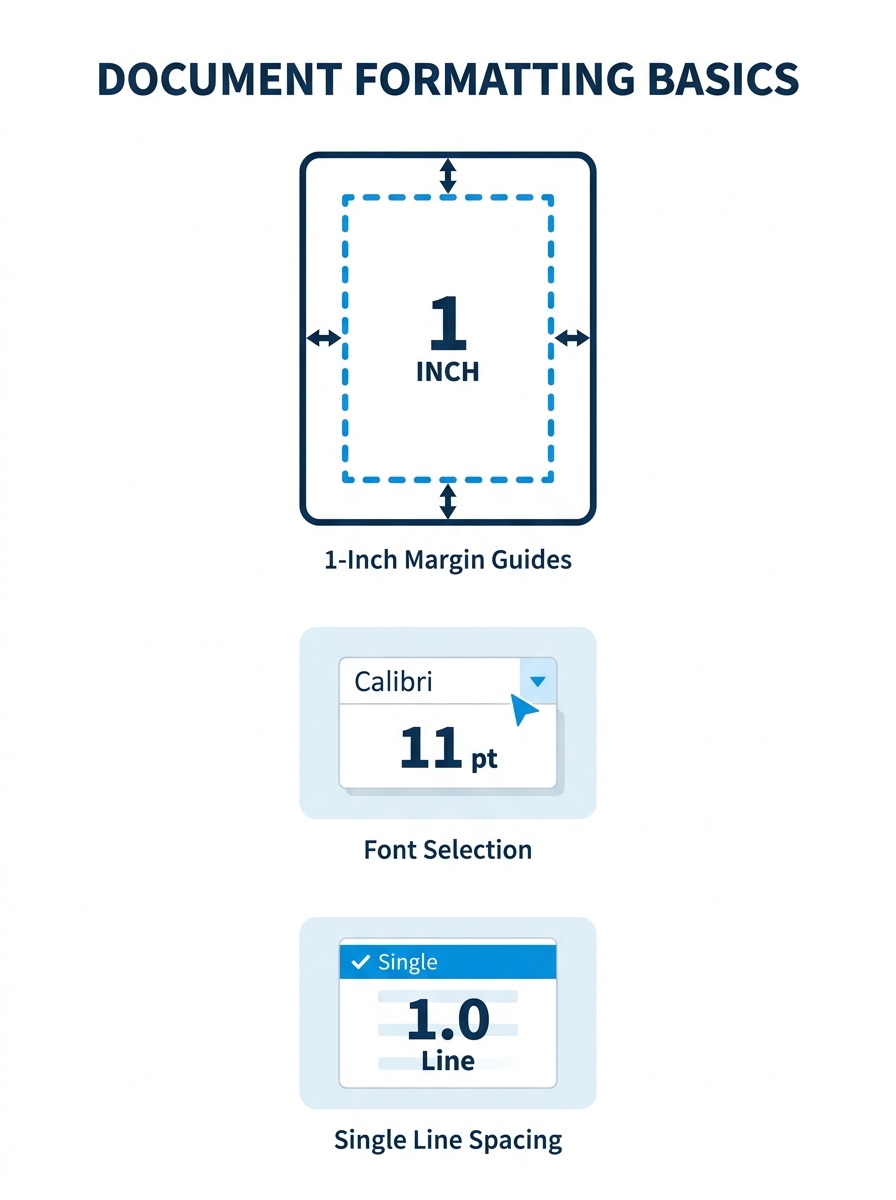
Open a new blank document. Set all four margins (top, bottom, left, right) to 1 inch. The Hartford’s business letter guide confirms that 1-inch margins are the standard for professional correspondence because they maximize usable space without crowding the page.
Set your font to Calibri, Arial, or Times New Roman at 10 to 12 points. Grammarly’s cover letter formatting guide is direct on this point: “Stick with simple layouts—complicated layouts can confuse ATS and render your data unsearchable. Use standard fonts like Times New Roman or Arial.”
Set line spacing to single (1.0) within paragraphs. Set paragraph spacing to 0pt before and 6–8pt after each paragraph. This creates breathing room between blocks without adding unnecessary blank lines.
You’ll know it worked when your document shows a clean, empty page with roughly equal white space on all four edges and text that, when you type a test sentence, appears in your chosen font at the correct size.
Tip: If you’re using Google Docs, change the default line spacing from 1.15 to 1.0 under Format > Line & Paragraph Spacing. Google’s default adds extra space that throws off your one-page target.
Step 2: Build the Header Block
The header block contains your contact information, the date, and the employer’s address. It anchors the top of the page and should visually match your resume header whenever possible.
Start with your full name in 14-point bold on the first line. Below that, in your standard body font size (10–12pt), add your phone number, professional email address, city and state (full street address isn’t necessary), and optionally your LinkedIn profile URL. Stack these on separate lines or place them on a single line separated by vertical bars—either approach works.
Leave one blank line after your contact info, then type today’s date in full format: October 2, 2026 (not 10/2/26 or 2026-10-02). Purdue OWL’s business letter standards specify that the date should be left-justified in full-block format, which is the format you’re using.
Leave another blank line, then add the recipient’s information: hiring manager’s name, their title, company name, and company address. Write to a specific person whenever possible. If you genuinely can’t find the hiring manager’s name after checking the job posting, the company’s About page, and LinkedIn, use “Hiring Manager” or “Hiring Committee” as a placeholder.
You’ll know it worked when the top of your page shows three distinct blocks (your info, the date, their info) with consistent spacing between them. Our cover letter structure guide shows examples of how this header should look in finished form.
Step 3: Write the Greeting
The greeting is one line. It goes directly below the employer’s address, separated by one blank line.
Use “Dear [First Name] [Last Name],” with a comma. If you’re writing in a more formal industry (law, government, academia), use “Dear Mr./Ms. [Last Name]:”. The colon is slightly more formal than the comma.
Avoid “To Whom It May Concern”—it signals that you didn’t research the company. Avoid “Dear Sir/Madam” for the same reason, and because it makes assumptions about gender. If you’re stuck with no name at all, “Dear Hiring Manager,” works and reads as professional rather than lazy.
You’ll know it worked when the greeting sits on its own line, uses the correct name, and ends with a comma or colon.
Step 4: Draft the Opening Paragraph
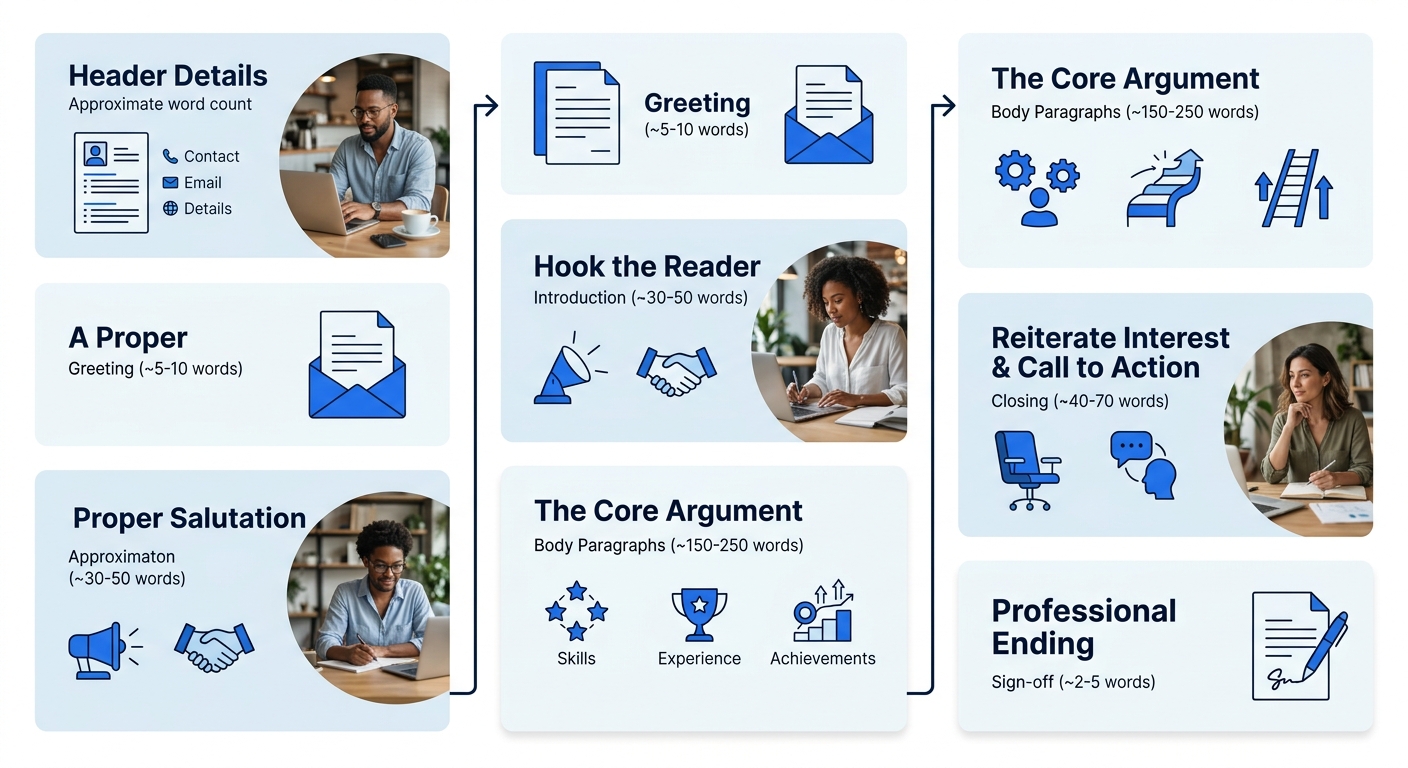
The introduction paragraph does three things in 2 to 3 sentences: names the specific position you’re applying for, explains how you found it, and delivers one compelling reason you’re a strong fit.
Write the position title exactly as it appears in the job posting, including any reference numbers. If someone referred you, name them here. Then give the hiring manager a reason to keep reading—your most relevant achievement, a specific skill match, or a connection to the company’s mission.
This paragraph should run 40 to 60 words. Anything longer and you’re burying the lead. Anything shorter and you’re missing the chance to hook the reader. Indeed’s formatting guide states that “a simple, clean format with standard headings helps ensure your letter is parsed correctly and reaches a human,” and this opening paragraph is where clean structure meets actual persuasion.
Step 5: Write the Body
The body section is where your cover letter earns its keep. You have 1 to 2 paragraphs and roughly 150 to 200 words to connect your experience to what the employer needs.
Each body paragraph should follow a simple structure: name a requirement from the job posting, describe a specific accomplishment that demonstrates you meet it, and quantify the result if possible. Don’t repeat your resume bullet-for-bullet. Instead, pick 2 to 3 of your strongest relevant achievements and give them context that a resume can’t.
For example, if the job asks for “experience managing cross-functional teams,” don’t just say you managed cross-functional teams. Describe a specific project, the size of the team, the outcome, and what you learned. This is where you tailor the letter format to the specific role rather than sending a generic version.
A cover letter that repeats your resume is a wasted page. Use the body to give context, motivation, and proof that doesn’t fit in bullet points.
Keep paragraphs to 4 to 6 sentences each. Wall-of-text body sections get skimmed or skipped. And remember the overall word target: your entire cover letter, all six sections included, should land between 250 and 400 words total. That constraint forces you to be specific and eliminates filler.
Step 6: Write the Closing and Sign-Off
The closing paragraph restates your enthusiasm for the role in 2 to 3 sentences, includes a clear call to action (like expressing your availability for an interview), and thanks the reader for their time.
Don’t introduce new qualifications here. Don’t apologize for anything missing from your resume. And don’t beg. A confident, direct closing works better than a hedging one. Something like: “I’d welcome the opportunity to discuss how my background in X aligns with your team’s goals. I’m available at your convenience and look forward to hearing from you.”
After the closing paragraph, leave one blank line and add your sign-off. Standard professional closings include “Sincerely,” “Best regards,” or “Respectfully.” According to Simply Noted’s business letter formatting guide, the conventional format calls for “four line spaces for handwritten signatures, then your typed name and title.” For a digital cover letter—which is nearly every cover letter—you skip the handwritten signature space and just type your full name directly below the sign-off.
You’ll know it worked when your sign-off sits below the closing paragraph with appropriate spacing, and your full name appears beneath it. If you’ve been following each step, the full document should fit on a single page with some white space at the bottom.
Step 7: Review, Save, and Export
This step catches the errors that get 64% of applications rejected before a human ever reads them. Read through the entire letter and check for these specific things:
Spelling and grammar. Run your word processor’s spell-check, then read the letter aloud. Spell-check won’t catch “manger” when you meant “manager.”
Name accuracy. Confirm the hiring manager’s name is spelled correctly. Confirm the company name is exactly right, including capitalization. Getting these wrong is an immediate disqualifier for most reviewers.
Length. Your letter should be one page, 250 to 400 words. If it spills to a second page, cut from the body paragraphs first.
File format. Save as PDF unless the application portal specifically requests .docx. PDF preserves your formatting across every device and operating system. Name the file in a clear format: FirstName-LastName-CoverLetter.pdf.
You’ll know it worked when the PDF opens cleanly on a different device, all the formatting is intact, and the word count falls within range. For additional formatting details, our cover letter formatting best practices guide covers edge cases like letterhead and email submissions.
Common Problems and How to Fix Them
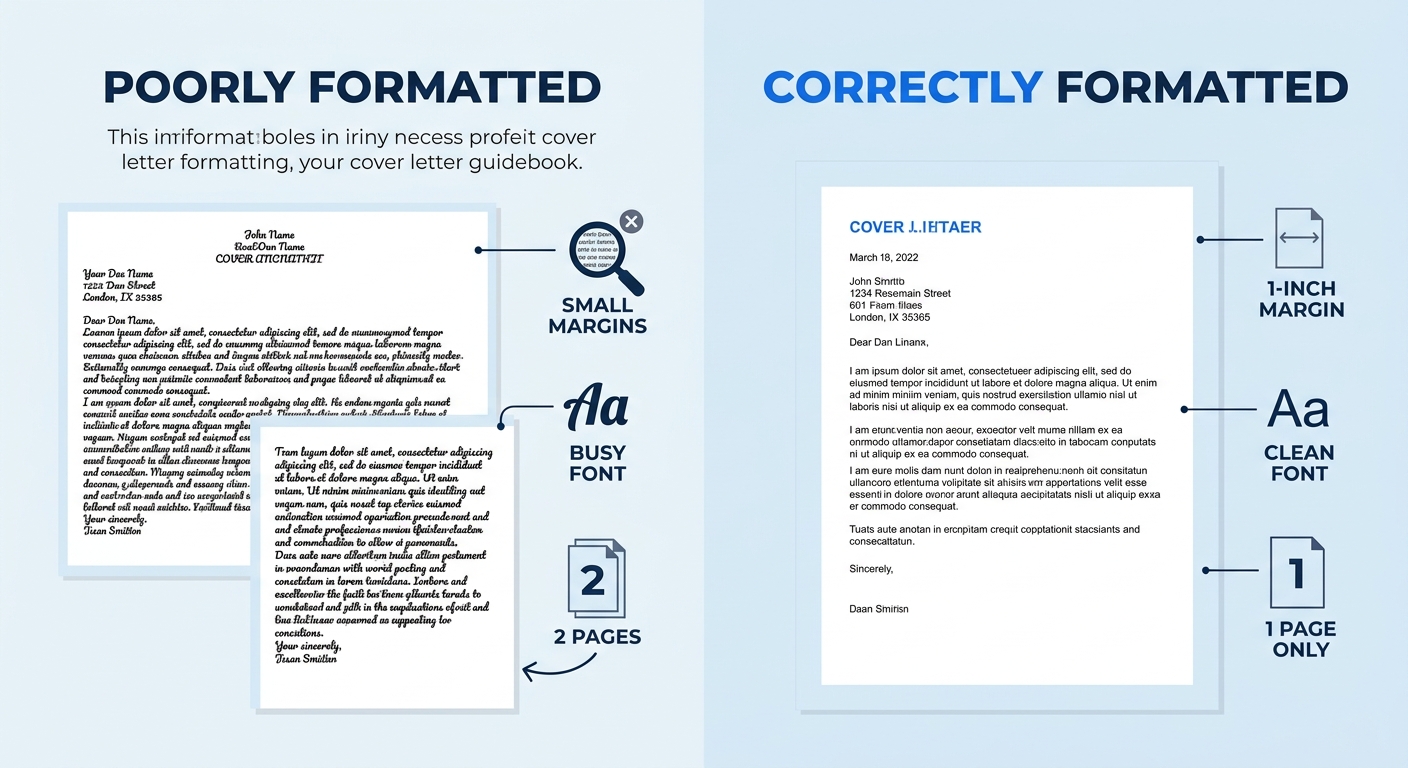
The letter runs to two pages. This is the most common issue. Cut adjectives first, then entire sentences that repeat information from your resume. Reduce your margin to 0.75 inches only as a last resort—it’s noticeable and looks cramped.
ATS isn’t reading the letter. If you’re getting zero callbacks, your formatting may be the problem. Remove any headers/footers that contain contact info (some ATS platforms can’t read them), delete text boxes or tables, and make sure your file is PDF or .docx, never .pages or .odt.
The header doesn’t match the resume. If your resume uses Calibri 11pt and your cover letter uses Times New Roman 12pt, the inconsistency signals carelessness. Use the same font family and size for both documents. You can find sample cover letter formats that demonstrate consistent header styling across document pairs.
Warning: Don’t add images, logos, or colored backgrounds to your cover letter. ATS software often can’t parse visual elements, and your letter may be rendered unsearchable in the employer’s system.
Where to Go From Here
With your letter cover format locked in, the structural work is done. The harder and more valuable work is customization: rewriting the introduction and body paragraphs for each application you submit. A well-formatted cover letter with generic content still underperforms a well-formatted letter tailored to a specific role and company.
Use the job posting as your editing guide. Highlight the 3 to 5 most important requirements, then confirm that your body paragraphs address at least 2 of them with specific evidence. Swap out achievements as the requirements change from role to role. The format stays the same; the content inside it shifts with every application.