
 4.9
4.9 4.5
4.5Eighty-three percent of hiring managers say poor formatting cancels out the advantage of a strong resume. This tutorial gives you the exact format for a cover letter with specific margin, font, and spacing values, plus a section-by-section build order you can finish in roughly 20 minutes.
TL;DR: Use full block format (everything left-aligned) with 1-inch margins, a professional 10–12pt font like Calibri or Arial, single spacing within paragraphs, and a blank line between sections. Structure: header → greeting → opening paragraph → body → closing → sign-off. Save as PDF unless the job posting asks for DOCX.
Before You Start
You need three things before opening your word processor. First, the job posting itself, printed or in a second window, because you’ll pull keywords directly from it. Second, the hiring manager’s name and title. If neither appears in the posting, check the company’s LinkedIn page or team directory. Third, two to three specific accomplishments from your career that connect to the role’s requirements. Have these written down as bullet points so you’re not drafting cold.
Tools: Any word processor works. Google Docs, Microsoft Word, and LibreOffice Writer all support the settings below. You don’t need a paid template or a design tool.
Time: About 20 minutes for the formatting and structure. Writing the actual content takes another 20–40 minutes depending on how much tailoring you do.
Skill level: None beyond basic word processing. If you can change a font size and set a margin, you’re set.
Step 1: Set Your Document Defaults
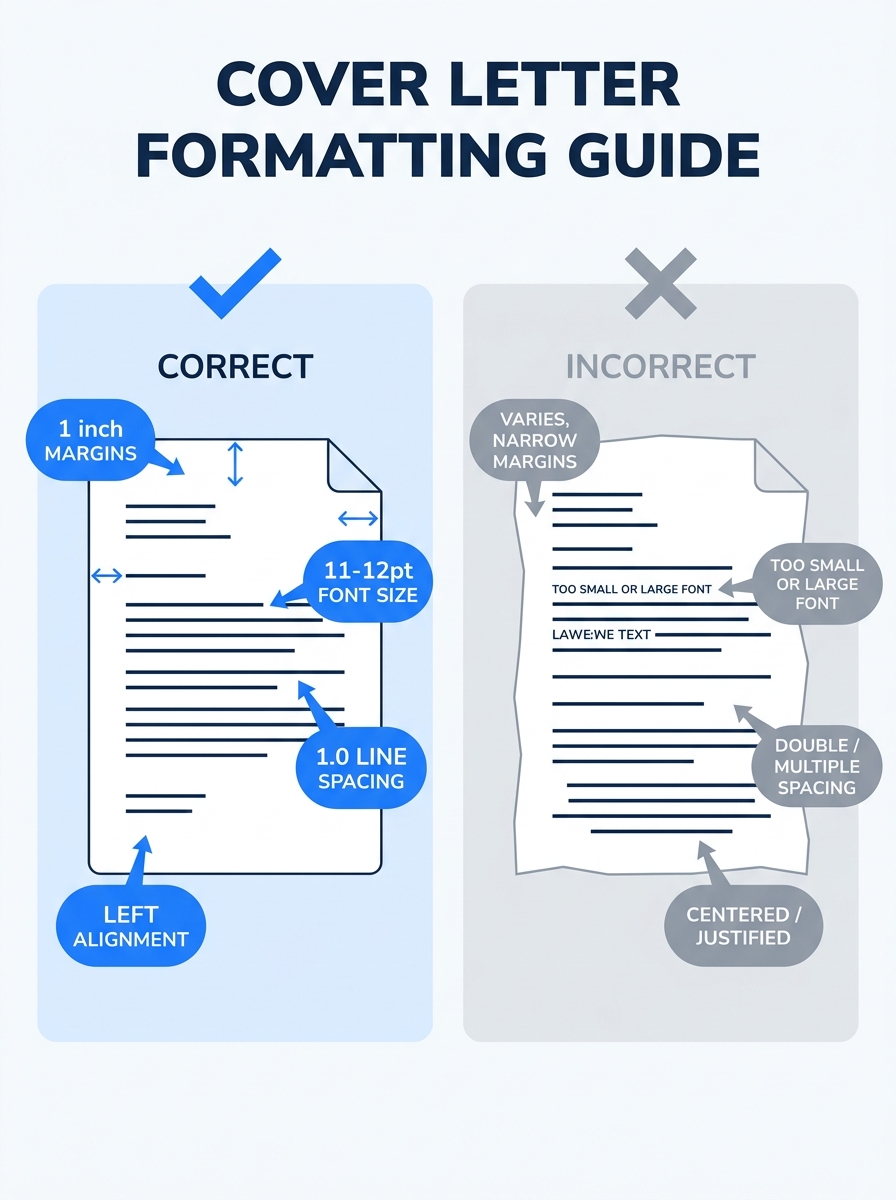
This step locks in the three settings that control whether your letter looks professional or amateur: margins, font, and line spacing. According to Grammarly’s formatting guide, you should “use single-spaced lines within paragraphs, and leave a space between each paragraph,” with a professional font like Times New Roman or Arial at a size of 12 for readability.
Here are the exact values:
- Margins: 1 inch on all four sides. Resume.io’s spacing guidelines specify you can reduce to 0.75 inches, and no less than 0.5 inches, only if your letter runs onto a second page. Don’t shrink margins preemptively.
- Font: Calibri, Arial, Garamond, or Times New Roman. Pick one and use it for the entire document. Body text should be 10–12 points. Your name in the header can go to 14 points bold.
- Line spacing: Single (1.0) within paragraphs. One blank line between paragraphs. Never double-space a cover letter, as it reads like an academic essay and pushes the content past one page.
- Alignment: Left-justified for everything. Full block format is the most common business letter format because, as the Purdue OWL notes, you don’t have to worry about indents and everything stays left-aligned.
You’ll know it worked when your document shows 1-inch margins in the ruler, your body text is 11 or 12pt in your chosen font, and the spacing dropdown reads “Single” or “1.0.”
Tip: Match your cover letter’s font and size to your resume. If your resume uses 11pt Calibri, your cover letter should use 11pt Calibri. Hiring managers often view both documents side by side, and inconsistency signals carelessness.
Step 2: Build the Header and Greeting
The header is the first block of text at the top of your letter. It contains your contact information, the date, and the employer’s details. Indeed.com’s formatting guide recommends beginning with “a clean header containing your details and the employer’s information at the top of the page.”
Your contact block (lines 1–3 or 4 of the document):
- Full name (14pt bold)
- Phone number | Email address | City, State
- LinkedIn URL (optional, include only if your profile is polished)
Leave one blank line after your contact block, then type the date. Use the full format: September 28, 2026. Leave another blank line.
Employer’s contact block (next 3–4 lines):
- Hiring manager’s full name
- Their title
- Company name
- Company address (city and state at minimum)
Leave one blank line, then write your greeting.
The greeting line should read “Dear [First Name] [Last Name]:” followed by a colon. If you can’t determine the person’s gender, it’s perfectly acceptable to use the full name. As the Purdue OWL at Purdue University explains, “you might write Dear Chris Harmon: if you were unsure of Chris’s gender.” Avoid “To Whom It May Concern,” which 64% of recruiters flag as outdated and impersonal according to hiring data. “Dear Hiring Manager:” works as a last resort when you genuinely can’t find a name.
You’ll know it worked when your header has your info, the date, the employer’s info, and a personalized greeting, each separated by a single blank line, all left-aligned.
Step 3: Draft the Opening Paragraph
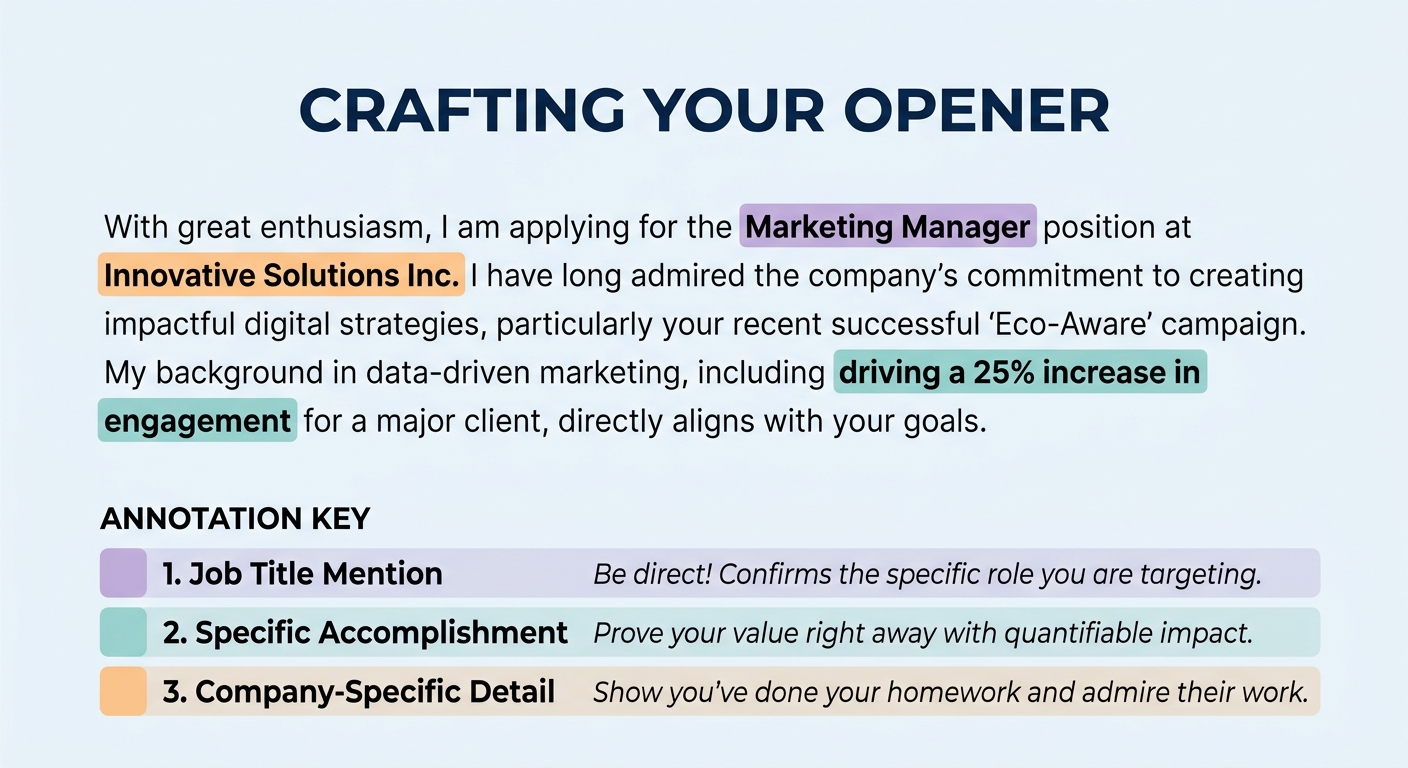
Your first paragraph runs 2–4 sentences and has one job: state why you’re writing and what makes you a relevant candidate. MIT’s Career Advising & Professional Development office puts it plainly: “State clearly in your opening sentence the purpose for your letter and a brief professional introduction.”
A strong opening names the specific role, where you found it, and one concrete reason you’re qualified. Here’s a formula that works:
Sentence 1: I’m writing to apply for [Job Title] at [Company], which I found on [Source]. Sentence 2: With [X years] of experience in [relevant area], I’ve [specific accomplishment that mirrors the job’s top requirement]. Sentence 3 (optional): [One sentence connecting your enthusiasm to something specific about the company.]
Keep this paragraph to 40–60 words. Anything longer and you’re burying the lead. Recruiters spend an average of 7 seconds on initial document scans, so front-loading matters. Avoid generic phrases that hiring managers filter out like “I believe I would be a great fit” or “I’m a passionate team player.”
You’ll know it worked when a reader can identify the role you want, your headline qualification, and the company name without reading past the first paragraph.
Step 4: Write the Body
The body takes 1–2 paragraphs and occupies the middle third of the page. This is where you prove your claims with evidence. Target 250–400 words for the entire letter, which means the body usually accounts for 100–200 of those words.
Each body paragraph should follow this structure:
- Open with a claim tied to a requirement from the job posting.
- Support it with a specific number or result. “Reduced customer onboarding time by 35% over six months” beats “improved processes.”
- Connect the result back to the employer’s needs.
If the posting lists five requirements, pick the top two or three. Trying to address every bullet point turns your letter into a bloated checklist. A focused body that maps your 2–3 strongest achievements to the employer’s top priorities is stronger than a paragraph that skims everything.
Pull keywords directly from the job description and weave them into your sentences naturally. Grammarly’s guide advises writers to “add keywords from the job post throughout your cover letter” while sticking “with simple layouts” because “complicated layouts can confuse ATS and render your data unsearchable.” This is where many applicants go wrong: they add tables, columns, or colored sidebars to make the body stand out visually. ATS software can’t parse those elements reliably, and the letter gets garbled or skipped entirely.
If you need a reference for how this section fits into the broader document structure, our cover letter formatting guide walks through spacing and alignment in more detail.
You’ll know it worked when each body paragraph contains at least one measurable result and at least one keyword that appears in the job posting.
Step 5: Close, Sign Off, and Save
The closing paragraph runs 2–3 sentences. It should restate your interest, mention your availability, and include a specific call to action. “I’d welcome the opportunity to discuss how my background in supply chain management aligns with your Q4 expansion goals. I’m available for a conversation at your convenience and can be reached at [phone/email].”
After the closing paragraph, leave one blank line and type your sign-off. Use “Sincerely,” or “Best regards,” followed by a comma. Leave 3–4 blank lines for a handwritten signature (if printing), then type your full name. Some applicants add their phone number again below their name, which is fine but optional since it already appears in the header.
A cover letter should use a clean business letter layout with short paragraphs, consistent spacing, and enough white space to remain easy to read.
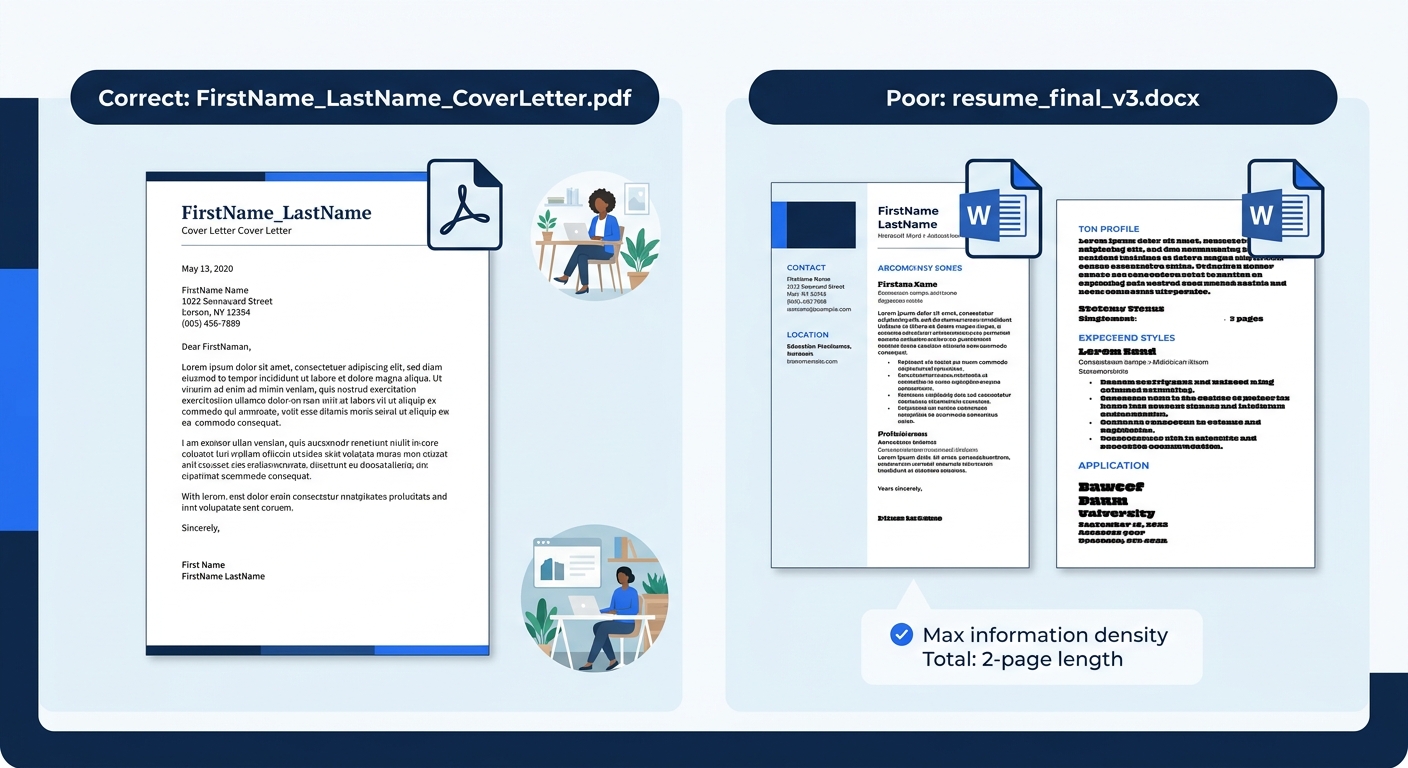
Saving and naming the file: Save as PDF to preserve your formatting across devices and operating systems. The exception is when a job portal explicitly asks for DOCX, which about 15% of online application systems do. Name the file FirstName_LastName_CoverLetter.pdf so the hiring manager can find it instantly among dozens of downloaded attachments. A file named “cover letter final v3.docx” signals disorganization.
For more examples of how finished letters look across different industries, browse our cover letter template samples.
You’ll know it worked when your file is a single page, saved as PDF (or DOCX if required), and named with your full name plus “CoverLetter.”
Common Formatting Mistakes and How to Fix Them
Three problems account for most formatting rejections:
Problem 1: The letter spills onto a second page. This happens when margins are set too wide (1.25 inches is a common Word default) or font size is 12pt when 11pt would fit. Fix it by reducing font size to 11pt first, then trimming margins to 0.75 inches if needed. Cut filler sentences before touching layout settings. If you’re still over one page after both adjustments, your letter has a content problem, not a formatting one.
Problem 2: The ATS can’t read the file. Headers in text boxes, two-column layouts, and embedded images all cause parsing failures. Stick to plain text typed directly into the document body. No text boxes, no tables, no graphics. If you want a visual header on the version you email to a human, keep a separate ATS-safe version with a standard left-aligned header for online submissions.
Problem 3: Fonts render differently on the recipient’s machine. This is why PDF matters. A beautifully formatted letter in Garamond can turn into a mess of misaligned text if the recipient doesn’t have that font installed and you sent a DOCX file. PDF embeds the font data, so what you see is what they see. If you must send DOCX, stick to system-default fonts like Arial or Calibri that are installed on virtually every computer.
If you want to understand how to format a cover letter for email-only submissions where you paste directly into the message body, the approach changes: skip the formal header, use the email client’s default font, and move your contact details into your email signature.
Where to Go From Here
With your cover letter formatted and saved, the document itself is done. But the format for a cover letter is only the container. What goes inside it determines whether you get called back. Spend your next session refining the content: tighten each body paragraph so every sentence earns its space, replace vague claims with numbers, and read the whole thing aloud to catch phrases that sound stiff on your tongue. If you’re applying to multiple roles, duplicate the formatted file as a template and swap in new achievements and keywords for each posting. The structure stays the same. The details change every time. And if you’re building a resume to go alongside it, consider working from a structured template that uses the same font, spacing, and margin values so both documents look like they belong together.