
 4.9
4.9 4.5
4.5This guide gives you a seven-step practice system for turning public speaking techniques into interview performance gains. Each step takes 15–30 minutes. By the end, you’ll have a rehearsed, recorded, and stress-tested delivery ready for your next screening call or final-round panel.
TL;DR: Treat your interview like a speech: research the audience, structure your answers, record yourself, practice with a partner, fix your body language, learn to use silence, and run a full dress rehearsal. Three hours of total prep spread across a week.
Before You Start
You don’t need presentation software, a speech coach, or prior stage experience. You do need these three things:
- A recording device. Your phone’s camera works. You’ll use it in Steps 3 and 7 to review your own delivery, which is the single fastest feedback loop available.
- A willing practice partner. A friend, family member, or fellow job seeker who can sit through a 15-minute mock session. One partner is enough. If you can’t find one, Steps 3 and 6 still work solo.
- A list of 8–10 common interview questions for your target role. Glassdoor and Indeed both maintain role-specific question banks. Pull questions before you start so you aren’t improvising prompts during practice.
Time commitment: roughly three hours total, broken across five to seven days. Spacing the steps out matters more than cramming them into a single afternoon because muscle memory in vocal delivery and body language needs overnight consolidation to stick.
Info: 86% of job interviews now happen online, and 61% of recruiters expect video to fully replace in-person interviews. Every step below works for both on-camera and in-person formats, but Steps 5 and 7 include video-specific adjustments.
Step 1: Research the Company Like You’re Preparing a Keynote
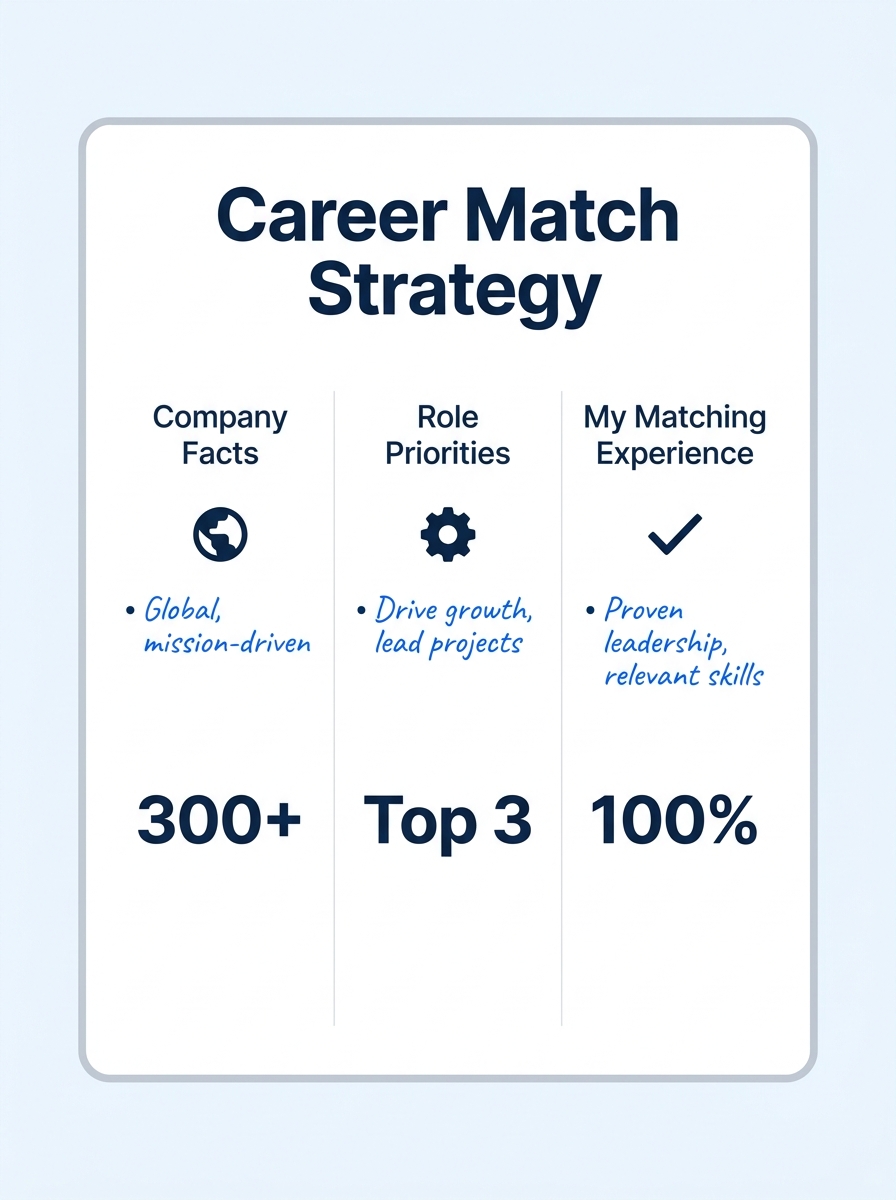
The goal here is to build enough context that your answers sound tailored, specific, and grounded in the company’s actual situation. Advice on public speaking almost always starts with “know your audience,” and interviews are no different. You’re speaking to an audience of one to four people who care about their company’s problems.
The action: Spend 20 minutes reading the company’s About page, recent press releases, and the last two quarterly earnings calls (if public). Write down three specific facts you can reference during answers: a product launch, a recent hire, a market they’re expanding into. Then review the job posting line by line and underline the three responsibilities that appear most prominent.
You’ll know it worked when you can explain, without looking at your notes, what the company’s current top priority is and why this role supports it. If you’re struggling with where to focus your broader search strategy, our breakdown of how traditional job search tactics are losing ground has useful context on timing your preparation.
Step 2: Build a Library of Structured Answers
Every strong interview answer follows a structure that public speakers use instinctively: context, action, result. In interview coaching, this is called the STAR framework (Situation, Task, Action, Result), and it works because it gives your interviewer a story arc instead of a list of adjectives.
The action: Take your 8–10 questions from the prerequisites. For each one, write a bullet-point outline (not a script) using four lines:
- Situation: One sentence describing the context. Include a specific number, timeframe, or team size.
- Task: One sentence on what you were responsible for.
- Action: Two to three sentences on what you did, with at least one concrete detail (a tool, a decision, a tradeoff).
- Result: One sentence with a measurable outcome. Revenue, percentage improvement, time saved, team size scaled.
You’ll know it worked when each answer outline fits on a single index card and takes 60–90 seconds to deliver aloud. If an answer runs past two minutes, cut the situation section shorter. Research on charismatic delivery shows that speakers who use structured narratives can raise their perceived leadership ratings by up to 60%, so the format itself does heavy lifting for your credibility.
Step 3: Record Yourself Answering Three Questions
This is the step where most people’s advice on public speaking starts and stops: “just practice.” The recording is what makes practice productive. Without playback, you can’t hear your filler words, see your eye contact habits, or notice that you’re speaking 40% faster than you think.
The action: Set your phone against a stack of books at eye level. Pick three questions from your library. Hit record. Answer each one using your bullet-point outline. Don’t stop or restart, even if you stumble.
Then watch the recording with a pen and paper. Track three things:
- Filler word count. Tally every “um,” “uh,” “like,” “you know,” and “so” that doesn’t serve a grammatical purpose. Most people average 5–8 per minute before practice and can cut that to 1–2 within three sessions.
- Answer length. Time each answer. Flag anything under 30 seconds (too thin) or over two minutes (too long).
- Eye contact. For video interviews, are you looking at the camera lens or at the screen? For in-person practice, are you looking at the phone’s lens?
You’ll know it worked when you can watch your own recording without cringing at a specific delivery habit. That awareness is the baseline. If you want to go deeper on vocal delivery mechanics, our guide on mastering public speaking delivery breaks down pacing, pitch, and volume control.

Step 4: Practice with a Live Partner
Solo recording catches mechanical problems. A live partner catches conversational ones: Do you listen to the full question before answering? Do you adjust your answer based on their reaction? Do you recover gracefully when a question surprises you?
The action: Sit across from your practice partner (or on a video call). Give them your question list. Ask them to pick five questions in any order, and to follow up on at least two answers with “Can you tell me more about that?” or “What would you do differently?”
After the session, ask your partner two questions: “Did any answer feel too long?” and “Was there a moment where you lost track of what I was saying?”
You’ll know it worked when your partner can summarize your best answer back to you in one sentence. If they can’t, the answer needs tightening. As Speakeasy Inc.’s interview coaching team advises, practice sessions with friends or recording yourself are the fastest way to improve tone, delivery, and nonverbal communication simultaneously.
Tip: Ask your partner to throw in one question that’s not on your list. Practicing the moment of surprise is valuable. The goal isn’t to have a perfect answer for every possible question. The goal is to stay composed and structured when a question catches you off guard.
Step 5: Fix Your Non-Verbal Delivery
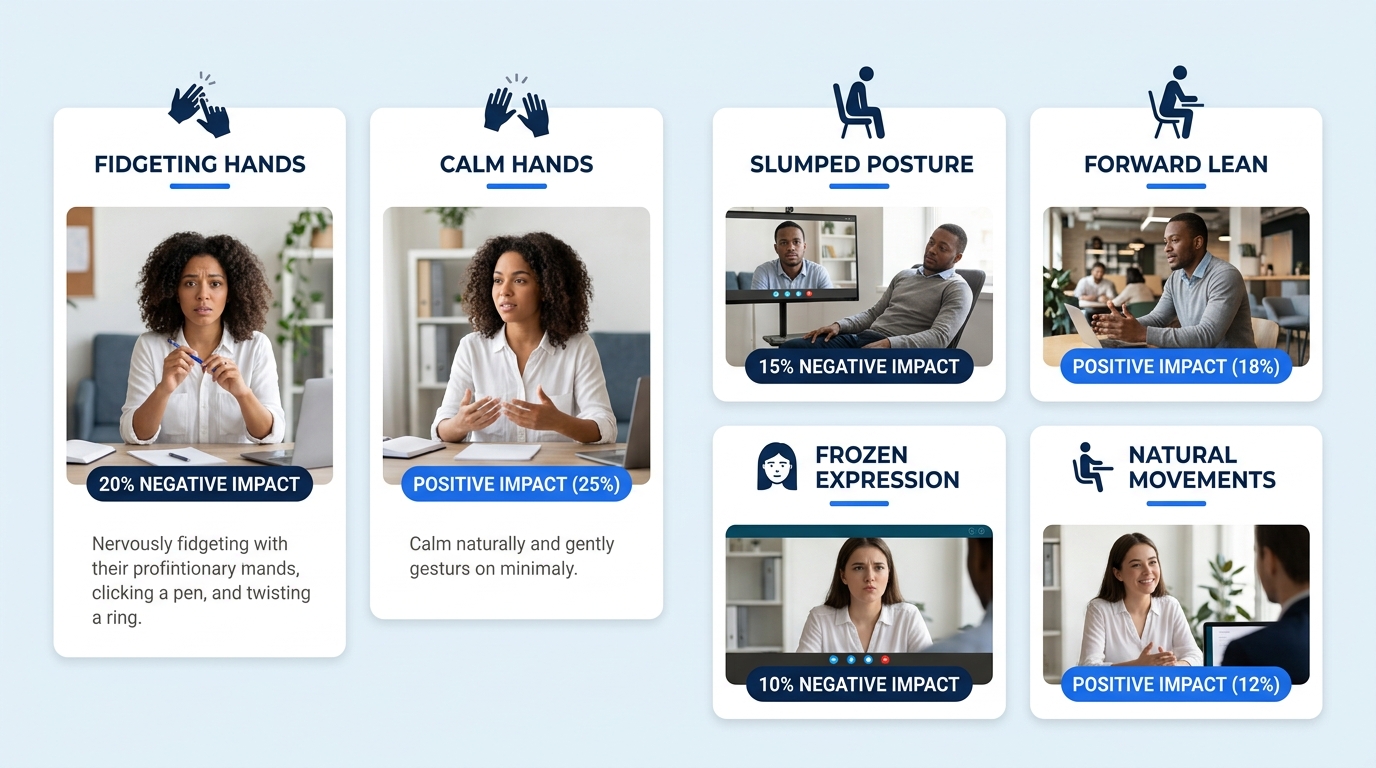
Non-verbal cues account for 55% of communication impact according to widely cited communication research, with vocal tone carrying 38% and words themselves carrying only 7%. You don’t need to obsess over body language, but you do need to address the three biggest problems most candidates have: fidgeting, closed posture, and a frozen face.
The action: Re-watch your Step 3 recording, but this time ignore the content of your answers entirely. Watch with the sound off. Score yourself on three things:
- Hands. Are they visible and relatively still, or are they fidgeting with a pen, touching your face, or hidden below the frame? For video interviews, keep your hands in the lower third of the frame when gesturing.
- Posture. Are you leaning slightly forward (engaged) or slumped back (disengaged)? Sitting up straight with a slight forward lean reads as interest.
- Facial expression. Does your face change at all during the recording, or are you delivering every answer with the same expression? A natural shift between listening (slight nod, soft eyes) and answering (more direct gaze, occasional eyebrow movement) signals that you’re present.
You’ll know it worked when your silent playback looks like someone who’s engaged in a conversation rather than someone reciting a report. Our guide on public speaking techniques for interview success covers additional non-verbal adjustments for panel settings where you’re addressing multiple interviewers.
Step 6: Learn to Use Silence
This is the step that separates candidates who sound rehearsed from candidates who sound confident. Most people fill every pause with “um” or rush into an answer before they’ve finished thinking. Professional speakers do the opposite. They pause, think visibly, and then answer.
The action: Have your partner ask you three questions you haven’t fully prepared for. Before answering each one, pause for a full three seconds. (Count “one-Mississippi, two-Mississippi, three-Mississippi” in your head.) Then begin your answer.
Three seconds feels painfully long when you’re the one pausing. It feels completely normal to the person watching. As one public speaking instructor puts it: “It’s fine, even good, to let someone see you think; it just proves that you can.” The caveat: if your interviewer starts looking at their watch, the pause has gone on too long.
You’ll know it worked when you can pause for three seconds before an answer without filling it with a filler word or apologizing for thinking. That pause gives your brain time to organize a STAR-structured answer instead of rambling through an unstructured one.
Step 7: Run a Full Dress Rehearsal
The final step ties everything together. You’re simulating the actual interview conditions as closely as possible: same clothes, same location, same technology, same time pressure.
The action: For a video interview, set up your actual interview environment: the chair you’ll sit in, the lighting you’ll use, the background that’ll be visible. Open your video conferencing tool and start a solo meeting to check your camera angle, microphone levels, and internet stability. Then have your partner join for a 20-minute simulated interview using a mix of questions from your library and two to three surprises.
For an in-person interview, wear your interview outfit and sit at a table across from your partner. Treat the full 20 minutes as a continuous interview with no breaks or do-overs.
After the rehearsal, review one thing: your opening 60 seconds. The first minute sets the interviewer’s impression. 90% of public speaking anxiety stems from lack of preparation, and the first minute is where that anxiety hits hardest. If your opening answer felt shaky, run it two more times until the opening 60 seconds feel automatic.
You’ll know it worked when you can get through the full 20 minutes without needing to break character, check your notes, or restart an answer.
When Things Go Wrong
Three problems come up repeatedly, even after thorough preparation:
Your mind goes blank mid-answer. This happens to everyone. Say “Let me come back to that point” and bridge to a related fact you do remember. Interviewers don’t penalize momentary blanks. They penalize spiraling or apologizing for 30 seconds. Drexel University’s career counseling team recommends being honest about your nerves rather than pretending they don’t exist.
Your internet drops during a video interview. Rejoin immediately. Don’t apologize more than once. Say “I’m back, sorry about that. You were asking about…” and pick up exactly where you left off. Having your interviewer’s phone number written down before the call starts gives you a backup channel if the video platform fails completely.
You get a question that has nothing to do with the role. Some interviewers ask curveball questions to see how you handle ambiguity. Use the pause from Step 6, then give a short, structured answer. The content matters less than your composure. If you’ve been dealing with boundary-crossing questions from hiring managers, that’s a separate issue worth understanding.
The goal of practice isn’t to memorize perfect answers. The goal is to make structured, composed delivery your default setting so your brain can focus on the conversation instead of managing panic.
Where to Go From Here
Once you’ve run through all seven steps, you have a repeatable system. Every new interview gets easier because you’re updating your answer library and refining your delivery rather than starting from scratch. If you’re preparing for a company with a specific interview format, like Amazon’s Leadership Principles panels, our roundup of Amazon interview prep coaching resources covers the structural adjustments those interviews require.
The 60% of employers who consider public speaking a key workforce competency aren’t looking for TED Talk polish. They’re looking for someone who can organize thoughts under pressure, deliver information clearly, and stay composed when the conversation takes an unexpected turn. That’s what these seven steps build. And the best part is that every hour you invest in interview delivery practice carries over into presentations, client calls, and team meetings for the rest of your career.